
Procedural tools for PGA Tour
The need for procedural content creation for games is increasing more than ever. The is the result of growing demand for generating more assets in less amount of time with more control and the ability of reiterating their production. Recently more artists and technical artists are recognizing the real value of procedural content creation and therefore trying to learn, expand and embed that workflow in their pipelines. EA is not an exception. It could easily be observed that how many procedural tools have been created over the last few years.
With the fast transition of the golf game (PGA Tour) to Frostbite, procedural methods became a necessity for generating or regenerating many of the assets one of which is the Terrain. Generating terrain has always been one of the main concerns for the PGA Tour as it is the core of the game; so is the Vegetation. Also some fantasy courses required procedural Rocks. These are an example of tools in Houdini that are developed for the PGA Tour game which are explained here.


Many assets in PGA Tour game were created procedurally
Terrain Heightmap Generator

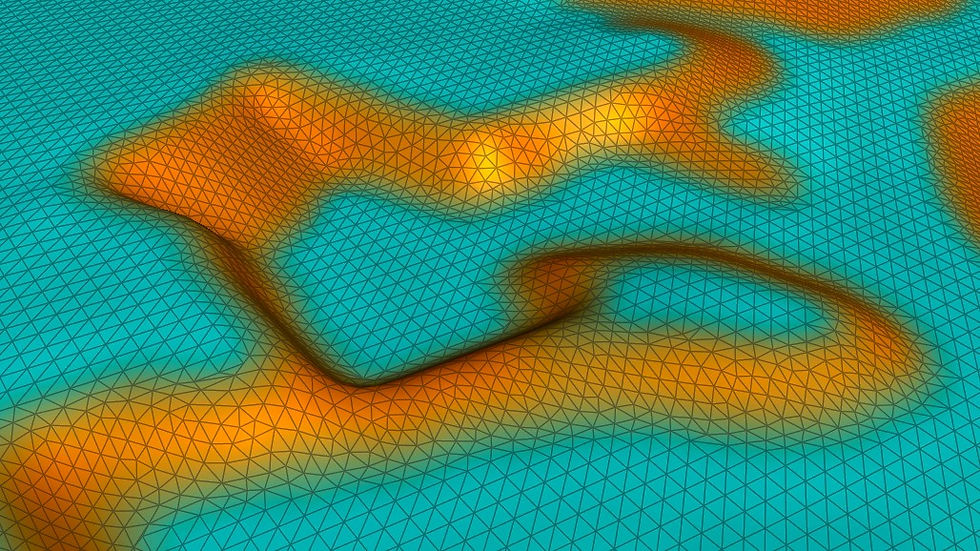
Previously on Gen3 games, the terrain was manually created as polygonal meshes. Frostbite’s terrain on the other hand are created from a height map which is a 16 bit per channel black and white image (with black for the lowest and white for the highest altitude) containing the elevation data of the land (Fig. 2). This image could be created manually or from existing data. At the moment we have two different sets of data for generating those height maps: Gen3 Meshes and Scanned Point Clouds.

The base of the workflow is defining the bounding box of the meshes, finding the height of each point in the scale of 0 to 1 comparing to the minimum and the maximum of the bounding box and translating that number into a gray color from black to white (Fig. 3).

Gen3 Meshes
Gen3 meshes need some preparation in order to be used in the Heightmap. Previously each course was consisted of different holes each of which had a separate mesh. The first step is gathering all those separate holes into one single terrain mesh and placing it in a suitable coordinate at the origin of the 3D world (Fig. 4).

Then that mesh is exported as an alembic file. There are also a lot of curve networks which are necessary for creating masks and other calculations and needed to be sent to Houdini and will be explained shortly. The water meshes should be a separate object in the Maya scene as it needs some extra manipulation. Gen3 water meshes were flat surfaces and the depth was faked in the shader. In Frostbite the bottom of the water should exist as actual data. The main parameter used in calculating the depth for the water meshes is the distance from the shore which is then mapped into a curve (Fig. 5).

The binormal of the curves are depending on their direction. But it is a tedious task for the artists to manually correct of the wall curves. In order to fist the direction of the wall curves first the edges of the water are extracted as right handed closed curves, their normal vector which is pointing toward +Y. Because the curves are right handed the tangent and binormal vector are the same among all of them and could be used as a standard for calculating the binormals of the wall curves. Each wall curve will look for the binormal vector of the nearest point on the water edge. If the curve’s binormal at that certain point is the same as that near point’s binormal it means that the direction of the wall curve is correct otherwise the curve needs to be reversed (Fig. 6)

Now that the wall curves are corrected we need to determine where on the bodies of water are affected by the wall curves. In order to do so a vector is calculated by subtracting the point on the water and the nearest point on the wall curve. Then the dot product of that connecting vector and the binormal of that near point on the curve is calculated. If the dot product is negative it means that that point on the wall curve does not “see” that point on the water body and therefore does not affect it; i.e. it cancels the depth calculation and turns it into zero (Fig. 7).

Now that we have the natural depth and the sudden depth we can get the minimum of those two and find out the depth. A smoothing level could be applied if needed in order to create a more organic look. Some water meshes are very simple and need to be subdivided a few times before it could be used for the depth calculation process.

Laser Scanned Data
The scanned data are really condense and heavy and therefore not really suitable. Also we need geometry in order to render the height maps. Triangulating those data take a very long time and it is not very convenient. The main software used for handling, cleaning and preparing point cloud data is Leica Geosystems HDS Cyclone. This software (which is shipped with Leica’s laser scanners) is used for processing, registration and editing point cloud data. One of the main feature of Cyclone is the ability of averaging point cloud in the form of a grid mesh. These meshes are used for creating the Heightmap.
The problem with this type of mesh is that it does not have radial edge flow and therefore creates lots of artifacts around sharp corners and where there are sudden changes in the undulation (Fig. 9 -1).
In order to overcome that problem, those areas are recognized and re-meshed (Fig. 9 - 2). Other areas such as bunkers and water edges which need more precision could be replaced by curve that was mentioned before. Those curves are triangulated (for creating points on their surface) and projected into the mesh. For the water depth the same calculation as the Gen3 meshes are used.

Masks and Mow-lines
Masks are used in Frostbite for defining different areas on the terrain. These areas are mainly used for texturing layers. In order to create these masks, closed curves are needed. The curve networks that was mentioned before are used in this case. There are different ways to bring curves into the tool. Unfortunately Alembic files do not support curves very well. Also FBX files could be a little problematic. A small Python script is written for exporting the selected curve networks in Maya into a custom ASCII format which is later parsed with Python in and regenerated in Houdini (This method might change later into better solution such as parsing the “.ma” files which are ASCII and therefore easily parsed). By default all the curves are closed (except wall curves) and separated into different groups based on their name and groups in the Maya scene. From there it is pretty easy to render each one separately with a constant which color (Fig. 10 - 1).
Some areas of golf courses are covered with grass and usually mowed in certain directions. These areas are Fairway, Tee box and Green. The direction of the mowed grass can be manifested in the shader and later in the direction of the grass strands. The tool uses the same curves as the masks to create Mow line textures. In order to save memory, it is decided to export the direction into only one color channel. But for recreating a vector from a texture we need at least two values. For solving this problem the amount of bending on the grass strands are supposed a constant value the direction is calculated from mapping the angle which ranges in the interval of [0, 360] degrees in the trigonometric circle to the interval of [0, 1]. In this case the value of 0 (or black) and 1 both means +X (or east), 0.25 means +Z or north, 0.5 is –X or west and so on. Another problem is that it will be very hard and inconvenient for the artist to manually change the angle of each piece. The best way to tackle this problem is that to calculate a default value for the direction of the mow lines on each piece and offer the artist the freedom of shifting these values from -90 to 90 degrees. This default direction is calculated by finding the longest axis of each piece (Fig. 10 - 2).


RockOn! Procedural Rock Generator

One of the challenges of environment modeling artists is creating organic and realistic rocks. Based on the complexity of the rocks, modeling of them can take from a few hours to two days. Other difficulties are creating a suitable texture and different Level of Details for them. RockOn! Is procedural a tool which generates convincing rock models (which could be used with no further modifications) or good base models for artists to start with. The interface is pretty easy to use and the parameters are pretty simple and optimized

The tool works with multiple layers of displacement which could be turned off or on and adjusted with parameters. The base model of this tool is a simple 4 x 4 x 4 cube which is projected into a sphere. The reason for using a box is avoiding poles. If the user wants rocks with sharp edges the main shape (the first layer of displacement) is created based on Worley Noise. In this noise algorithm a series of points are randomly scattered on a surface (or in space). Then for every point of the surface the function finds its distance to the nearest point from those scattered points. If the desired rocks are rounder with no sharp edges, Perlin noise is used with only 2 levels of turbulence (less details). The user also has the ability to blend between these values.

For The second layer of displacement another Worley noise pattern is used, but with a higher frequency and a lower magnitude. The third level (the mid-range detail) is generated with another Perlin noise with clamped values. The fourth and fifth are also Perlin noises with lower and higher frequencies. Cracks are made with Voronoi noise; but instead of directly feeding the noise with the point positions of the surface, the point positions were first fed into a Perlin noise, and then into the Voronoi noise and then some further calculations were added. The LODs are generated simultaneously, but hidden from the user. For the sake of speed those calculations happen only at render time (Fig. 13).

For projecting textures onto the surface box mapping gives the best results. The biggest issue about box mapping is that it creates visible tiles. Another method of box mapping is used in this case which is called Blended Box Mapping. Basically it is consists of 3 perpendicular planner mappings which blend together based on the direction of the normal of the surface on each point. The advantage of this method is that it not only creates no seams, but also even non tileable textures could be used and the final texture will be with no seams. This method is called Blended Box Mapping (Fig. 14).

Tangent-space normal maps are generated based on the difference of the normal vectors of the 5th and 7th levels of detail models. For every point on the 5th LOD, a ray is shot toward the 7th LOD along the normal vector and that ray reads the normal vector of the 7th LOD. The new normal is then transformed into the tangent space. To do so first a suitable normal - tangent – binormal frame should be created. Every point on the surface has only one normal vector, but infinite tangent and binormal vectors. If the surface is parametric, u and v directions are already embedded into it.
But for polygonal surfaces we have to use the UV space. The problem is that u and v are only one number which does not provide us enough information. Therefore the rate of changes on each direction (u and v) could be used for each point on the surface. Houdini already provides such variables: dPds and dPdt. The problem with using these variable is that first they work only for shaders, second they are based on polygons and therefore the results they create are very faceted. The best substitute is Polyframe node which can provide normal, tangent and binormal based on the texture coordinates. Now that the perpendicular tangent frame is generated, the normal form the 7th LOD could be transformed into this frame by multiplying it to 3x3 matrix consists of normal, tangent and binormal of the 5th LOD surface. After creating the normal map and diffuse map, the ROP network exports them as textures using the original spherical UV layout (Fig. 15).

Tree Branch Texture Generator

Vegetation is another important element of the Golf game. Plant factory is a great software that generates convincing plant and tree models. One of the main issues with this software is that it does not provide an orthographic camera with precise coordinates so that the user can create textures for branch and twig clusters. Therefore Houdini is used to create diffuse, normal, specularity, roughness, sub-surface scattering and ambient occlusion texture maps for those branches with Branch Texture Generator tool.

First the artist needs to import those assets from plant factory into Maya or any other 3D package to arrange them based on desired UV layout. Those models should be confined in a square area from -1 to 1 (in X and Y). That model then is exported as an Alembic file. The tool in Houdini reads the file and extracts the information of different parts of the model (barks and leaves). Using these information correct decisions are made about the material and textures. Also the UI updated dynamically based on those data. Although the tool takes a good guess about the path and the name of the texture files, the user is able to choose different textures for different parts.

For the diffuse texture a simple constant shader is used which reads the color and alpha map from the texture file and correctly populates them on different parts of the model. For the specularity / roughness / subsurface scattering maps it is a little more complicated. Each of these values are stored in one channel of a single texture. The bark is dense and therefore the SSS is not applicable to it. But for the leaves the blue channel of the texture is used to calculate the transparency and saves those values on the blue channel of the transparency. For generating the normal map, first the user needs to input the normal map texture. These values are read and transformed into the object’s tangent space with the same method used for the RockOn! tool.
